Bondage Furniture
Bondage Furniture is a particular focus here at Paul Mauser
Studios. In particular, High-quality bondage equipment. I believe in
good materials, ergonomic engineering, proper woodworking techniques,
and quality finishing.
I think this makes my work unique, or at least rare, and I have as
high an expectation of my customers as I do of myself.
Design
 |
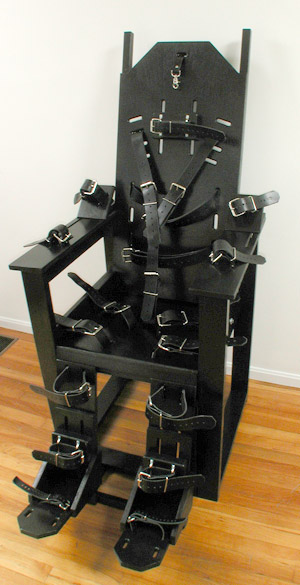
The Original Mark II bondage chair introduced in 2004 contained over 76
individual pieces
of wood, had 19 multi-part straps, adjustable neck, ankle foot and
elbow
rests, and optionally a self-bondage mechanism for the wrist
straps. This was quite a lot of work, and each one was built
individually to
spec.
As you can see, it was
Awesome. But all that work came at a cost, up to $2000, and that was
in 2004 dollars. Frankly, it was just too expensive for most people.
Only 8 were ever built (and #7 is my personal copy). Each
example was an improvement over the last (The one pictured here is
#3.), but each also took longer than the previous due to creeping
perfectionism. But I learned a lot about building quality
equipment in the process (Not to say that I didn't start off doing some
damned good work, thank you.)
When I talk about Ergonomic design, if you ever get a look at one of
these, you'll note that everything has a certain incline. In wood
and metalworking, right angles are easy, They're very comfortable
for the builder and the materials lend themselves to right angles
easily. But right angles are not comfortable. The seats at
Fast Food joints are made at right angles so you won't be comfortable
enough to loiter. By tilting the seat, inclining the back, and
swinging out the feet, this chair, even without padding, is very
comfortable. Some have stayed in it for several hours at a
stretch. That says something to me about how to make a good chair. |
Technique

 |
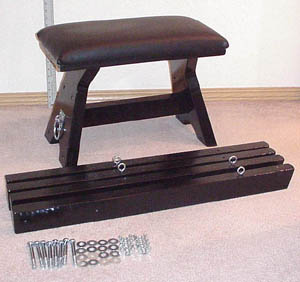
The Original Spanking Bench,
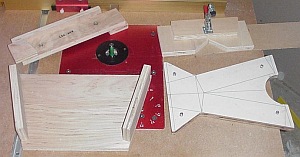
introduced in 2005 taught me how to use templates and jigs to make
perfectly matching and reproducible parts.
Any leg from any of the benches made for the original reseller will fit
any other, which means I can still make replacements and accessories
which will fit them.
This same technique will be applied to the Mark III chair on a grander scale.
When it comes to woodworking techniques, whacking something together
out of 2x4's straight from the home center with some deck screws isn't
going to cut it. Now run that 2x4 through a planer and a jointer
and you might unearth a decent piece of wood. Use proper joinery
techniques like biscuits, mortise and tenon joints, or pocket screws,
and you can end up with some quality furniture. I like to use
Furniture/cabinet grade hardwood veneer plywood from a specialty lumber
yard. It's more stable than that 2x4, and won't split or warp,
and the fine layer of maple or oak on the surface gives it impeccable
smoothness without knots. |
Finishing
Latex paint is cheap, non-toxic, dries fast, cleans up with water,
and is utter crap when it comes to making durable furniture. The
water raises the grain, the plasticizers in the paint can attack latex
clothing, and cause seemingly dry parts to stick together after as
little as a day of contact, even months after drying.
Here at the studio I go the extra mile, using my exclusive
ventilated paint booth, I apply an acrylic primer to all painted
pieces, re-sand (I am obsessive with my filling and sanding), and spray
with oil-based enamel, applying several coats over the course of a week
or so, and heat-dry. Oil-based enamel is glossier, harder, more
resistant to cleaners (but no finish is impervious to every chemical),
and is more resistant to "blocking" - the painter's term for
self-adhesion. Yes, it takes longer, requires a respirator and
other protective gear, but the results are worth it. Some folks
have looked at the gray chair and assumed it was made of metal.
My idea of unachievable perfection is to make it impossible to
tell. I'm working on it.


